Properly adjusted floating pins on your Maschio Jolly finish mower can make the difference between an uneven, patchy lawn and a perfectly manicured surface. This comprehensive guide walks you through the step-by-step process of adjusting these critical components for optimal performance and a professional-quality cut.
Understanding the Maschio Jolly Floating Pin System
The Maschio Jolly finish mower uses an innovative floating pin system that allows the mower deck to follow ground contours for an even cut across uneven terrain. This system consists of several key components working together to maintain consistent cutting height while adapting to landscape variations.
Key Components of the Floating Pin System
- Upper hitch arms – Connect to the tractor’s three-point hitch
- Lower hitch arms – Provide stability and support
- Pivot arms – Allow vertical movement of the deck
- Wheel forks – Support the wheels and contain adjustment mechanisms
- Floating pins – The adjustable components that determine deck height and float capability
When properly adjusted, these components work in harmony to deliver a perfectly even cut across your entire lawn, even over rolling terrain or slight depressions.
Step-by-Step Floating Pin Adjustment Process
Follow these precise steps to properly adjust the floating pins on your Maschio Jolly finish mower:
Prepare the equipment: Park your tractor and Maschio Jolly mower on a flat, level surface to ensure accurate adjustments.
Position the mower: Lower the mower until the blades are approximately 4 inches off the ground.
Level the deck: Check that the mower deck is level from side to side. If necessary, adjust the tractor’s lift arms to achieve proper leveling.
Locate the floating pins: Find the floating pins on the wheel forks and pivot arms of your Maschio Jolly mower.
Loosen locking nuts: Using a wrench or socket set, loosen the locking nuts on all floating pins to allow for adjustment.
Adjust pin height: Move the pins up or down to achieve your desired cutting height and appropriate deck float capability.
Ensure consistency: Verify that all pins are set to the same height to maintain an even cut across the entire mower width.
Secure adjustments: Tighten all locking nuts firmly to secure the floating pin positions.
Test the float: Push down on each corner of the mower deck to test its vertical movement. It should move up and down smoothly with appropriate resistance.
Fine-tune adjustments: Make additional minor adjustments as needed until optimal float is achieved across the entire mower deck.
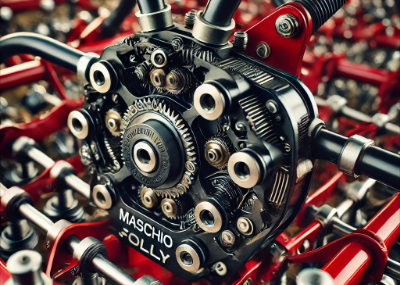
Maschio Jolly Floating Pin System: Diagram and Component Identification
Understanding the layout and interaction of the various components in your Maschio Jolly floating pin system is crucial for proper adjustment. Below is a detailed description of the key components you need to identify:
[Insert diagram image showing labeled pivot arms, wheel forks, and floating pin locations on a Maschio Jolly mower deck]
Component Identification Guide
- Pivot Arms: These connect to the mower frame and allow vertical movement
- Wheel Forks: House the wheel assemblies and contain the adjustable floating pins
- Floating Pins: The threaded rods with locking nuts that determine height and float capability
- Locking Nuts: Secure the floating pins in position after adjustment
- Hitch Connection Points: Where the mower attaches to the tractor’s three-point hitch
For replacement parts and additional diagrams, resources are available from specialized suppliers like Brooks Ag Parts and GA Equipment, which offer genuine Maschio components including wheel forks (part code T14008007 for 120, 150, and 180 models).
Pro Tips for Optimal Floating Pin Adjustment
Based on professional experience and insights from TractorByNet forum discussions, here are essential tips to achieve the perfect floating pin adjustment:
Start in the Middle
Begin your adjustment process with all floating pins set in the middle of their adjustment range. This provides a neutral starting point for fine-tuning.
Make Incremental Changes
Adjust pins in small, incremental movements rather than dramatic changes. This allows for precise tuning and prevents overcorrection.
Check Level Frequently
Verify the deck level frequently throughout the adjustment process to ensure you maintain proper balance across the entire mower width.
Mark Your Settings
Once you find optimal settings, mark the positions with paint or a permanent marker to make future adjustments easier and more consistent.
Lubricate Moving Parts
Apply lubricant to all pivot points and floating pin threads to ensure smooth movement and prevent binding during operation.
Replace Worn Components
Inspect pins for wear or damage and replace as needed to maintain precise adjustability and optimal performance.
Pro Insight from TractorByNet Forums:
“When adjusting floating pins on your Maschio Jolly, test the deck’s movement on each corner individually. If one corner moves differently than the others, you’ll need to readjust that specific pin. Consistency across all four corners is the key to a perfect cut.”
Troubleshooting Common Floating Pin Issues
Even with careful adjustment, you may encounter issues with your Maschio Jolly’s floating pin system. Here are solutions to common problems based on TractorByNet forum discussions:
Problem: Uneven Cutting Pattern
Solution: Verify that all floating pins are set to exactly the same height. Even small differences can result in noticeable cutting variations. Use a measuring tool to ensure precise consistency across all pins.
Problem: Excessive Deck Bouncing
Solution: Your floating pins may be set too loose, allowing too much vertical movement. Tighten the adjustment slightly to reduce bouncing while still maintaining sufficient ground-following capability.
Problem: Scalping on Uneven Terrain
Solution: Floating pins are likely set too low. Raise them slightly to provide more clearance and better float over uneven ground. Test in a small area before mowing the entire property.
Problem: Poor Ground Contour Following
Solution: Pins may be adjusted too tightly, restricting deck movement. Loosen them slightly to allow better adaptation to ground contours. Ensure pivot points are well-lubricated.
Important Warning:
Always stop the tractor engine and disengage the PTO before making any adjustments to your Maschio Jolly mower. Never place hands or tools near the cutting blades while the mower is connected to a running tractor.
Maintenance Tips for Long-Term Performance
Regular maintenance of your Maschio Jolly’s floating pin system will ensure consistent performance and extend the life of your equipment:
- Regular Cleaning: Remove grass clippings, dirt, and debris from the floating pin mechanisms after each use to prevent binding and corrosion.
- Scheduled Lubrication: Apply high-quality lubricant to all floating pins, pivot points, and moving parts at least once per mowing season.
- Routine Inspection: Check pins for wear, damage, or excessive play before each use, replacing components as needed.
- Periodic Adjustment: Verify floating pin settings at the beginning of each mowing season and after striking any obstacles.
- Hardware Tightening: Check and tighten all nuts, bolts, and fasteners related to the floating pin system on a regular schedule.
- Winter Storage: Before storing for the off-season, clean and lubricate all floating pin components and slightly loosen tension to reduce spring fatigue.
Frequently Asked Questions about Maschio Jolly Floating Pins
How often should I adjust the floating pins on my Maschio Jolly mower?
You should check and adjust floating pins before each mowing season begins, when changing cutting heights, and after striking any obstacles that might have affected alignment. Regular inspection ensures optimal performance and even cutting.
What tools do I need to adjust the floating pins?
You’ll need a standard wrench or socket set to loosen and tighten the locking nuts on the floating pins. A measuring tool such as a ruler or caliper is also helpful to ensure all pins are set to the same height.
Can worn floating pins affect my mower’s performance?
Yes, worn floating pins can significantly impact performance. They can cause uneven cutting patterns and poor ground following capability. If your pins show signs of excessive wear, threading damage, or bending, replace them with genuine Maschio parts for optimal results.
Is it normal for the mower deck to have some vertical play when adjusted properly?
Yes, some vertical movement is normal and necessary for the deck to properly float and follow ground contours. The amount of movement should be consistent across all corners of the deck. Too much or too little movement can lead to poor cutting results.
Where can I find replacement floating pins for my Maschio Jolly mower?
Genuine replacement floating pins and related components are available from authorized Maschio dealers and specialized parts suppliers such as Brooks Ag Parts, GA Equipment, and Beaver Valley Supply. Always use authentic Maschio components for proper fit and function.
Conclusion: Mastering Your Maschio Jolly Floating Pin Adjustments
Proper adjustment of your Maschio Jolly’s floating pin system is essential for achieving professional-quality cutting results across varying terrain. By following the step-by-step process outlined in this guide, you can ensure your finish mower delivers consistent, even cutting that will enhance the appearance of your property.
Remember these key takeaways:
- Start with a level setup on flat ground
- Make incremental adjustments to all floating pins
- Ensure consistent height settings across all pins
- Regularly inspect and maintain the floating pin system
- Address any issues promptly using the troubleshooting tips provided
With proper floating pin adjustment and regular maintenance, your Maschio Jolly finish mower will provide years of reliable service and beautiful cutting results. Take the time to master this adjustment process, and you’ll enjoy a perfectly manicured lawn that stands out from the rest.
Last Updated: March 27, 2025