Last Updated: March 30, 2025
Discover how to revitalize your aging tractor with modern alternator technology and LED lighting systems. This comprehensive guide covers everything from selecting the right components to step-by-step installation instructions, helping you achieve better electrical performance and enhanced visibility for safer, more efficient operation.
Understanding Why You Should Upgrade Your Tractor’s Electrical System
Many older tractors struggle with inadequate electrical output, especially when additional accessories are installed. If you’ve experienced dimming lights when operating at lower RPMs or have been unable to power modern implements, it’s time to consider upgrading your tractor’s alternator and lighting system.
Modern farming and agricultural work often extends into early mornings and evenings, making proper lighting essential for safety and productivity. The original electrical systems on vintage tractors simply weren’t designed for today’s power demands. By upgrading to a modern alternator and LED lighting, you’ll experience:
- Increased electrical output capacity for powering additional accessories
- More consistent voltage regulation at varying engine speeds
- Significantly improved visibility during low-light operations
- Reduced electrical system strain and battery drain
- Enhanced overall reliability and performance
Alternator Upgrade Guide: From Selection to Installation
Selecting the Right Alternator for Your Tractor
Choosing the appropriate alternator is crucial for a successful upgrade. Here are the key factors to consider when selecting a replacement:
Output Rating Requirements
Most modern tractors require at least a 60-amp alternator to effectively power LED lights and other accessories. If you plan to install multiple high-powered LED light bars, consider upgrading to an 80-amp or higher alternator to ensure adequate power supply without overtaxing your electrical system.
Mounting Compatibility
Verify that your new alternator is compatible with your tractor’s existing mounting brackets. In some cases, you may need a conversion kit or custom brackets, especially when upgrading from an older generator system to a modern alternator.
One-Wire vs. Three-Wire Alternators
One-wire alternators offer simpler installation but may not charge effectively at idle speeds. Three-wire alternators provide better charging at all engine speeds, making them ideal for tractors that spend significant time idling. Consider your typical operating conditions when making this choice.
Step-by-Step Alternator Installation Process
⚠️ SAFETY FIRST: Always disconnect the battery before beginning any electrical work on your tractor. This prevents potential short circuits and electrical hazards during installation.
-
1
Remove the old alternator or generator: Locate and loosen the adjustment bolt, then remove the mounting bolts. Carefully disconnect all electrical connections, making note of their positions for reference during installation of the new unit.
-
2
Prepare the mounting area: Clean the mounting surface and inspect for any damage or wear. If converting from a generator to an alternator, you may need to install an adapter bracket or modify the existing mount.
-
3
Install the new alternator: Mount the new alternator using the existing brackets or your conversion kit. Ensure it’s properly aligned and secure before proceeding with electrical connections.
-
4
Connect the wiring: For a one-wire alternator, simply connect the main output to the battery positive terminal. For three-wire alternators, connect the additional field wire to the ignition switch and ensure proper grounding according to the manufacturer’s instructions.
-
5
Test the installation: Reconnect the battery, start the tractor, and verify proper charging operation with a voltmeter. You should see approximately 13.5-14.5 volts at the battery with the engine running.
Wiring Diagram for Ford 8N/9N Tractor Alternator Upgrade
For owners of classic Ford 8N/9N tractors, here’s a simplified wiring guide for alternator installation:
Ford 8N/9N Alternator Wiring:

BAT+ Terminal → Battery Positive Terminal (via 10AWG wire)
Field Terminal → Ignition Switch (via 14AWG wire)
Ground → Tractor Frame (via 10AWG wire)

Note: Remove the original voltage regulator when installing
a one-wire alternator or use the appropriate terminals
when installing a three-wire system.
Always refer to manufacturer-specific instructions for your particular alternator model, as terminal designations may vary between brands.
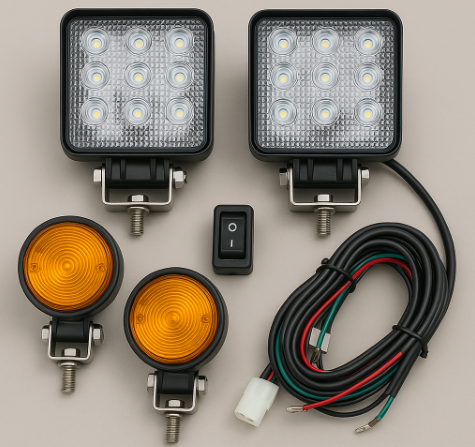
LED Lighting Upgrade: Maximum Visibility with Minimum Power Draw
Benefits of Switching to LED Lighting
Energy Efficiency
LED lights draw significantly less power than traditional halogen bulbs, reducing the strain on your tractor’s electrical system. While a typical halogen work light might draw 55-65 watts, an LED equivalent providing the same or better illumination may draw only 15-25 watts.
Extended Lifespan
LED lights typically last 30,000+ hours compared to just 1,000-2,000 hours for halogen bulbs. This translates to years of reliable operation without the hassle of frequent bulb replacements, even in harsh agricultural environments.
Superior Illumination
LEDs provide brighter, clearer illumination with better color rendering, making it easier to spot obstacles and hazards. The instantaneous full-brightness capability (unlike halogens that take time to warm up) enhances safety during night operations.
Vibration Resistance
Unlike filament-based halogen bulbs, LEDs have no fragile components, making them highly resistant to the vibration and shock common in tractor operations. This results in fewer failures and more consistent performance in tough conditions.
Selecting the Right LED Lighting for Your Tractor
With numerous LED lighting options available, consider these factors to choose the best solution for your specific needs:
Light Output and Beam Pattern
LED lights are rated in lumens, which measure actual light output. For general work lights, look for options with 1,800-3,000 lumens. Consider the beam pattern as well: flood beams provide wide coverage for close-range visibility, while spot beams offer focused, long-distance illumination. Many operators choose a combination of both for optimal coverage.
Voltage Compatibility
Ensure the LED lights you select are compatible with your tractor’s electrical system (typically 12V or 24V). Many LED lights offer multi-voltage capability (10-30V), making them suitable for various applications.
Durability Ratings
Look for lights with high IP (Ingress Protection) ratings. An IP67 or IP68 rating indicates the light is fully protected against dust and can withstand temporary or continuous water immersion—essential for agricultural environments.
Recommended LED Lighting Kits
Here are some highly-rated LED lighting kits specifically designed for tractor applications:
- Nilight 18W LED Work Light (4-Pack) – Perfect for general-purpose lighting, these compact but powerful lights offer excellent value for smaller tractors.
- RIGID Industries D-Series PRO – Premium-quality lights with exceptional durability and performance for those seeking professional-grade options.
- Tiger Lights LED Kit for John Deere – Model-specific kits designed for perfect fitment on particular tractor brands with true plug-and-play functionality.
Pro Tip: Many operators find that a combination of different light types provides the most versatile illumination. Consider installing flood beams on the sides for wide peripheral vision and spot beams in front for distance visibility.
LED Light Installation Best Practices
-
1
Plan your light placement: Before drilling any holes or making permanent modifications, temporarily position your lights and test them at night to ensure optimal coverage. Consider your typical working conditions and tasks when determining placement.
-
2
Use proper wiring: Always use marine-grade wire with appropriate gauge for the current draw. For most LED lights, 16-14 AWG wire is sufficient, but consult the manufacturer’s recommendations. Use heat-shrink connectors and grommets when passing wires through metal panels to prevent shorts and chafing.
-
3
Install separate switches: Consider wiring different light groups to separate switches for more versatile control. This allows you to activate only the lights needed for specific tasks, reducing unnecessary power consumption.
-
4
Include fuse protection: Always install inline fuses appropriate for your LED lights’ current draw. This provides essential protection against electrical shorts and potential fire hazards.
Important: When connecting multiple LED light bars or high-power lights, calculate the total amperage draw to ensure your newly upgraded alternator can handle the load. Most 60-amp alternators can comfortably power several LED light bars, but it’s always best to verify specifications.
Real-World Success: Case Study of a Ford 5000 Tractor Upgrade
To illustrate the practical benefits of these upgrades, let’s examine how one tractor owner successfully modernized their classic Ford 5000 tractor:
“My Ford 5000 had been running with the original generator system for decades, but it couldn’t keep up with modern accessory demands. I decided to upgrade to a GM-style alternator using a conversion kit specifically designed for this model. The process involved removing the old generator and voltage regulator, installing the new alternator with the custom mounting bracket, and rewiring the electrical system.”
“The results were immediately noticeable. The charging system now maintains a consistent 14.2 volts even at idle, and I was able to add four LED work lights that dramatically improved visibility during early morning and evening operations. What’s more, the system has been completely reliable through two full seasons of heavy use.”
This real-world example demonstrates that even vintage tractors can be successfully upgraded to modern electrical standards with the right approach and components.
Frequently Asked Questions About Tractor Electrical Upgrades
+ How much amperage do I need for LED light bars?
For most standard LED light bars, a 60-amp alternator provides sufficient power. However, if you’re planning to install multiple high-powered LED bars or additional electrical accessories, consider upgrading to an 80-amp or higher alternator to ensure adequate capacity without overtaxing your electrical system.
+ Can I install a one-wire alternator on my older tractor?
Yes, one-wire alternators can be installed on many older tractors, offering simpler installation. However, be aware that they may not charge effectively at idle speeds. If your tractor spends significant time idling, a three-wire alternator might be a better choice as it provides more consistent charging across all engine speeds.
+ Are there plug-and-play LED lighting kits available for specific tractor models?
Yes, many manufacturers now offer plug-and-play LED lighting kits designed for specific tractor models. These kits typically include all necessary mounting hardware and wiring harnesses for easy installation without extensive modifications. Tiger Lights, for example, offers model-specific kits for John Deere, Case IH, New Holland, and other major brands that provide direct replacements for original lighting fixtures.
+ Do I need to add a voltage regulator when installing a new alternator?
Most modern alternators have built-in voltage regulators, eliminating the need for an external regulator. If you’re upgrading from an older generator system that used an external regulator, you can typically remove it when installing a new alternator. However, always check the specifications of your particular alternator to confirm whether additional regulation is required.
Conclusion: Bring Your Tractor into the Modern Era
Upgrading your tractor’s alternator and lighting system represents one of the most practical and beneficial modifications you can make to an older agricultural machine. The combination of increased electrical capacity and modern LED lighting delivers immediate improvements in functionality, safety, and operator comfort.
With proper planning and component selection, these upgrades can be completed in a weekend, providing years of enhanced performance. Whether you’re restoring a classic tractor or simply looking to improve the utility of your trusty workhorse, modernizing the electrical system offers an excellent return on investment.
Remember these key takeaways:
- Choose an alternator with sufficient amperage output for your needs (minimum 60-amp recommended)
- Consider three-wire alternators for better performance at idle speeds
- Select LED lights with appropriate beam patterns and durability ratings
- Use proper wiring techniques and include fuse protection
- Plan your installation carefully to ensure optimal light positioning
By following this guide, you’ll transform your tractor’s electrical capabilities, extending its usability and ensuring it remains a productive part of your operation for years to come.
Looking for more machinery upgrades and maintenance guides? Check us out for more at Softwarestudylab.com